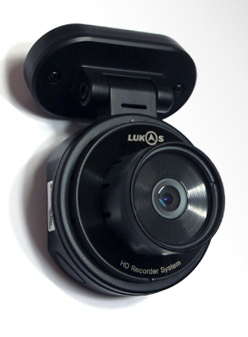
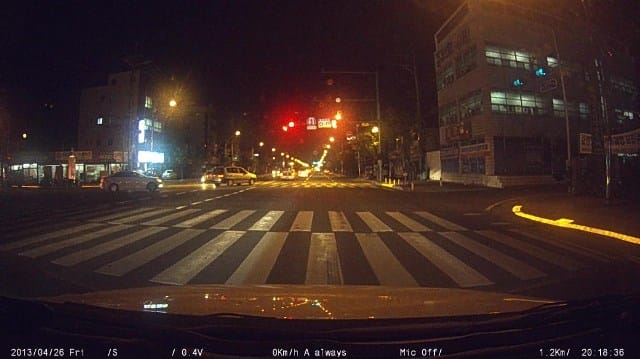
The Lukas LK-7900 Ace was released in early 2013 by the Korean manufacturer Qrontech. The camera has very good picture quality during the day and good picture quality at night. The night videos, while good are not the greatest. Before investing in this camera watch many night videos to see if it is acceptable for your needs. It records 1080p at 30f/s with an average bit rate of approximately 10,000kpbs. The camera utilizes a Sony Exmor CMOS sensor.
The unique feature of this dash cam is the ability to accept SDXC cards (max 128GB). This gives potentially 4 times the recording capacity of a traditional dash cam allowing approximately 29 hours of recording time before deleting the oldest video file.
This camera comes with a G-sensor and built-in GPS. Qrontech claims this camera has a very high temperature capability at approximately -20°C to 80°C operating and -30°C to 9°0C storage.
There is an optional circular polarizing lens (CPL) that can be purchased which helps reduce reflections and glare when shooting in sunny weather. The camera has a threaded 37mm lens that allows you to purchase a variety of filters if you want to tweak the video quality. These can be purchased from a variety of sources and not only Lucas. If you do opt for a CPL, it is recommended to remove it for night recording otherwise the video will be dark.
To date, Qrontech has been very responsive to user requests and has released updated firmware numerous times. This is a refreshing surprise since many of the Korean manufacturers have not had the best customer service reputation and some rarely release firmware updates to address major issue.
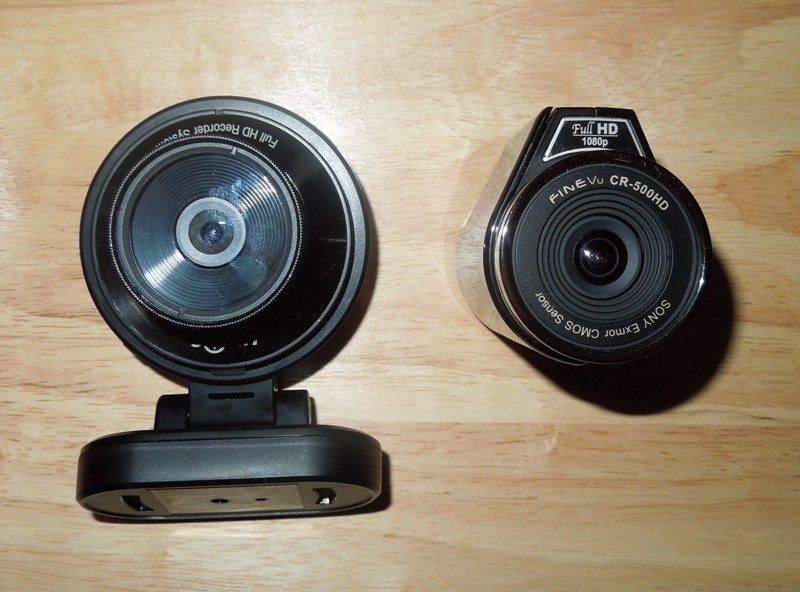
Size Comparison
The dimensions of the camera are 90x70x48mm, which is not too large. However many owners indicate that it is bulky and is larger in person than the pictures would have you believe.

Here is a comparison of the Lukas LK-7900 Ace with a FineVu CR-500HD.
Lukas LK-7900 ARA
The Lukas LK-7900 ARA is an upgrade to the LK-7900 ACE dash cam. Both cameras look identical and have the same form factor, but the ARA has 1 unique feature, the ability to connect to a cars ODB-II interface. This allows the recording of driving data such as RPM, acceleration, steering wheel position and brake pedal status. This turns the dash cam into a true black box.
Not all cars are compatible with the LK-7900 ARA’s ODB-II feature. Check on the Lukas web site (Applicable Vehicles), to see which models are covered.
Known problems
Blurry Image
Previously many users have complained that their camera has a blurry / soft image. You can download a raw video here to see the problem.
The manufacturer has indicted their are 2 possible causes for this:
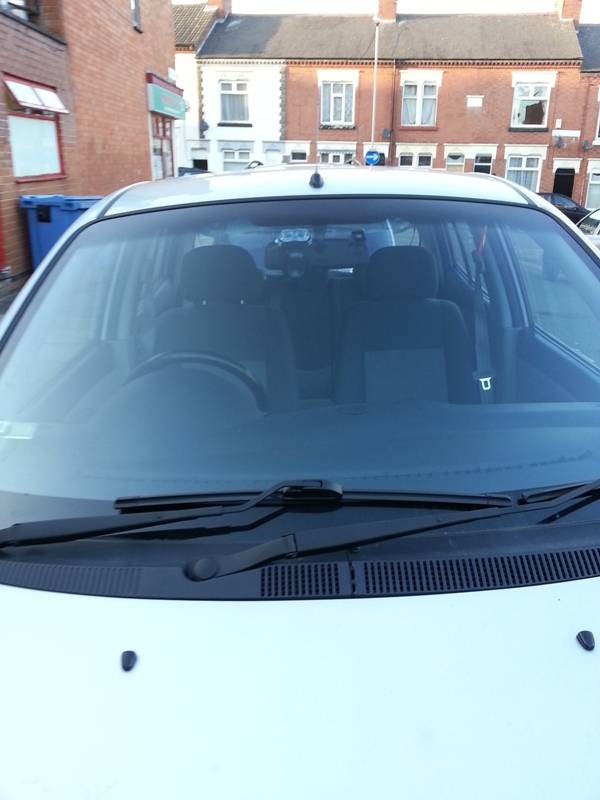
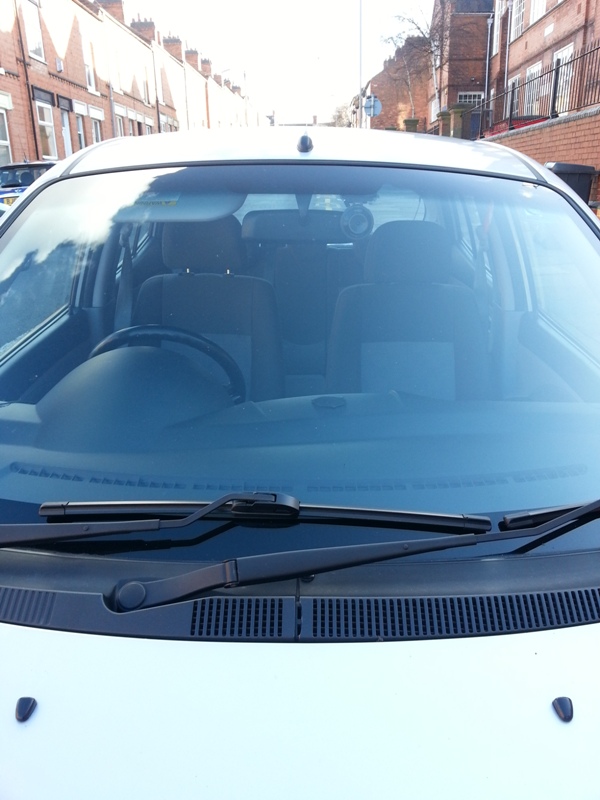
1. Image quality degradation due to front windshield glass tinting and CPL filter interference.
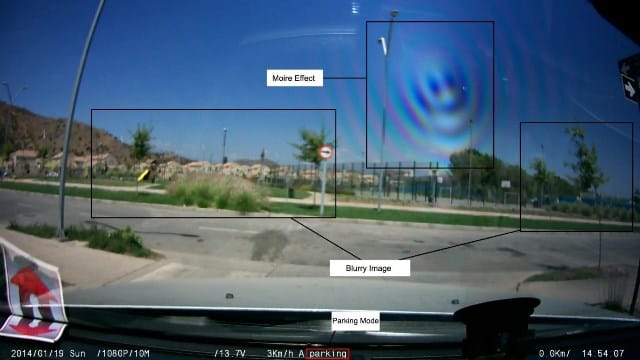
The “Moire Effect” in the following photo seems to indicate that is what is causing the issue.
To resolve this problem you can remove the tint from the windshield or remove the CPL filter. If the CPL filter is used, the angle needs to be adjusted as per Lukas directions to improve quality.
2. The second possible cause is image degradation due to exposure to direct sunlight and other environmental changes. When image is recorded with the car parked for a long time under direct sunlight, the camera lens can be affected (Refer to User’s Manual, page 4, Cautions in Usage 1). Also in parking mode, some functions of camera (Sharpness, AWB, RGB tuning) are turned off to increase motion sensitivity which will result in a lower quality image.
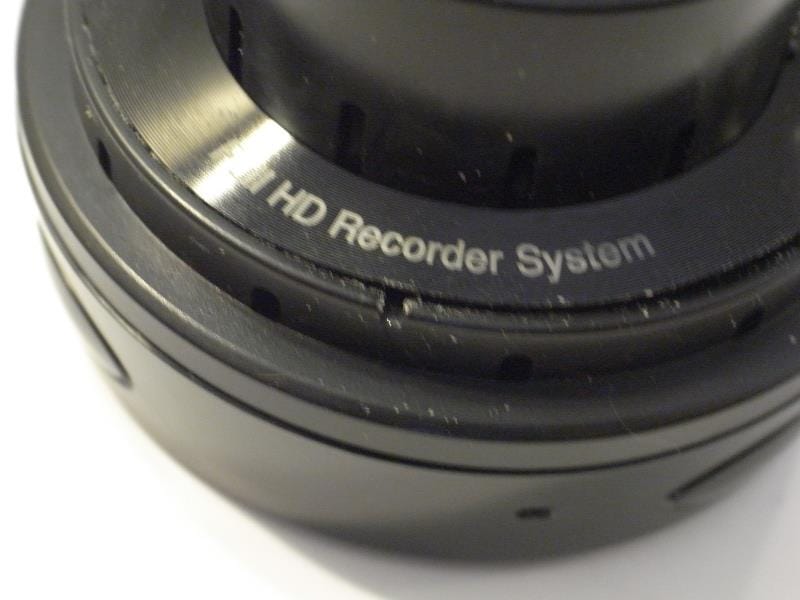
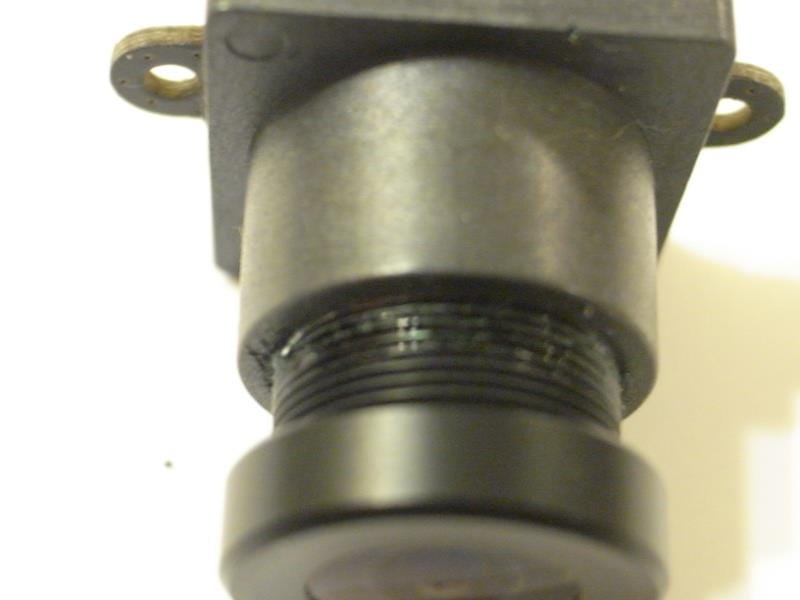
Refocusing the Camera
While the manufacturer does not indicate that the camera focus is a problem, some owners have disassembled their cameras to refocus them. Our member superpat described how he fixed it in this forum thread. The instructions are as follows:
READ THE WHOLE PROCEDURE BEFORE YOU START. If you do not feel confident that you understand and can perform the procedure then do not start it.
Before you start…We do not accept responsibility if you break your LK-7900, you do this at your own risk! We are NOT liable if your LK-7900 does not work after you attempt this!
ALSO before you start to disassemble, check the camera works with your bench 12v supply and VGA connected to a monitor.. Lets start with a known working item!
- Remove SD card and all cabling.
- Put camera on work bench lens uppermost. mount block (GPS) at 12 oclock.
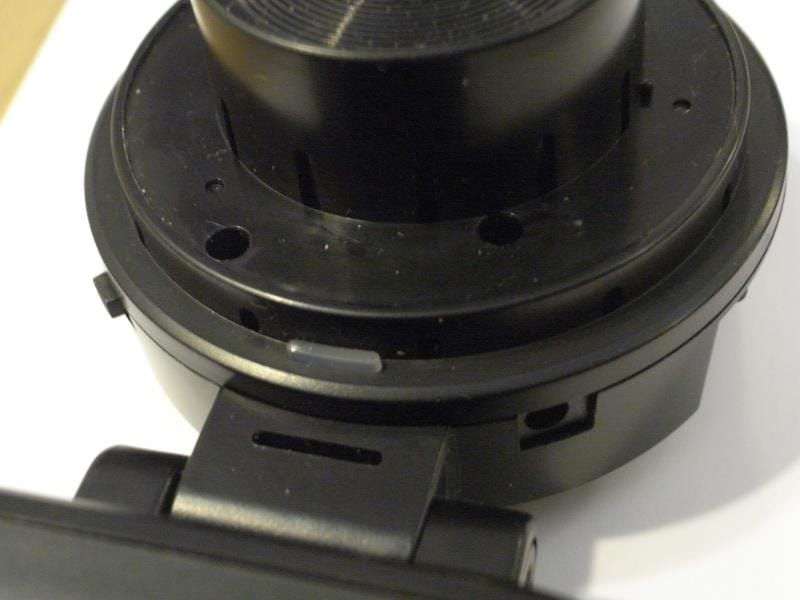
- At six oclock (bottom ) find small 2mm notch in rim.

- Insert a small thin flat blade into the slot and carefully start to lift the label upwards. Great care should be taken not to crease the thin plate.
- Gradually work your way around the whole ring until it comes free. Lift it away and store. The reverse side is tacky with impact adhesive.
- You will now see two holes at the bottom of the cam, previously covered by the plate.
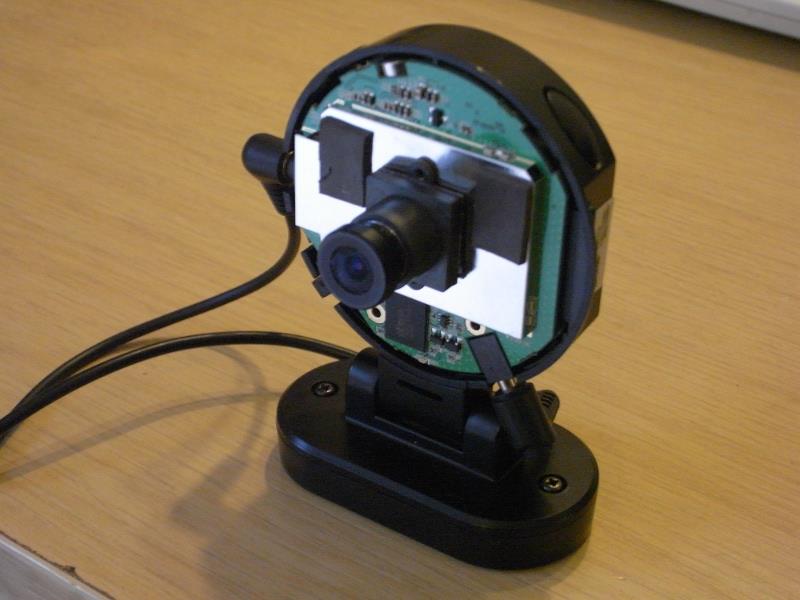
- With a small x-point screwdriver remove the two screws. With the cam lens upwards, lift the front plastic housing (containing the lens turret) away from the rear housing.
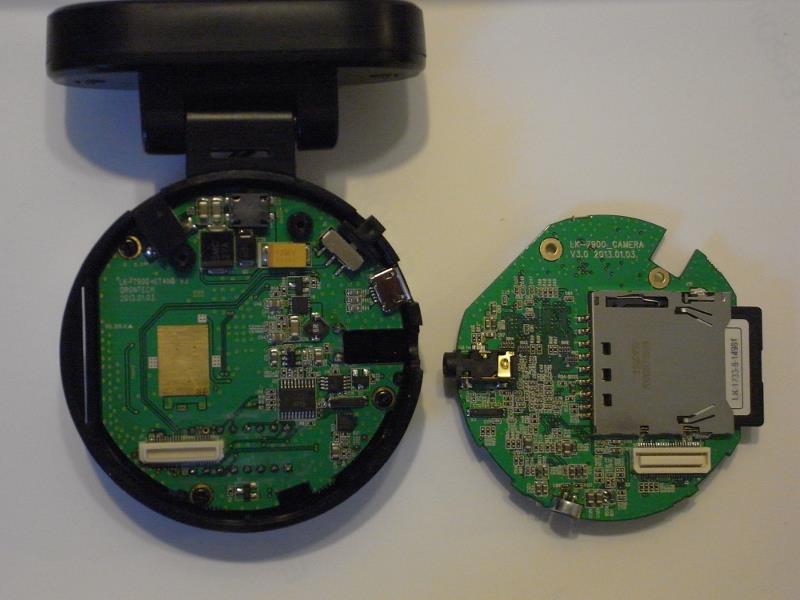
- Do this gently and keep the lift straight. The only thing holding the two halves together are the plugs and sockets on the pcbs. When you split the housing, either the lens pcb or the larger circular pcb will come away from the rear pcb which is screwed in. The lens holder and ccd pcb is screwed to the inside of the lens turret.
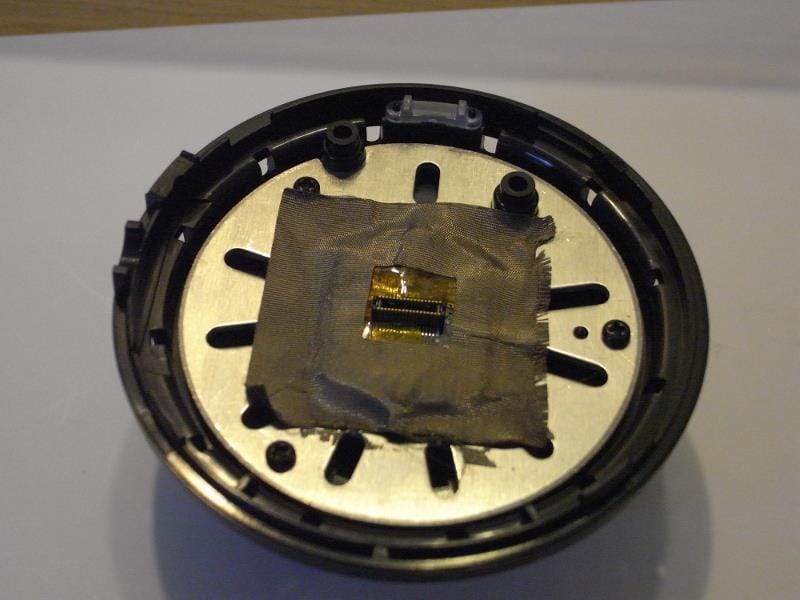
- Carefully remove the square of glass tape that is stuck onto the lens holder and heat sink…. You WILL need to use this again so remove it very carefully!
- Put a mark on the heatsink and edge of pcb so as to know orientation when reassembling cam.
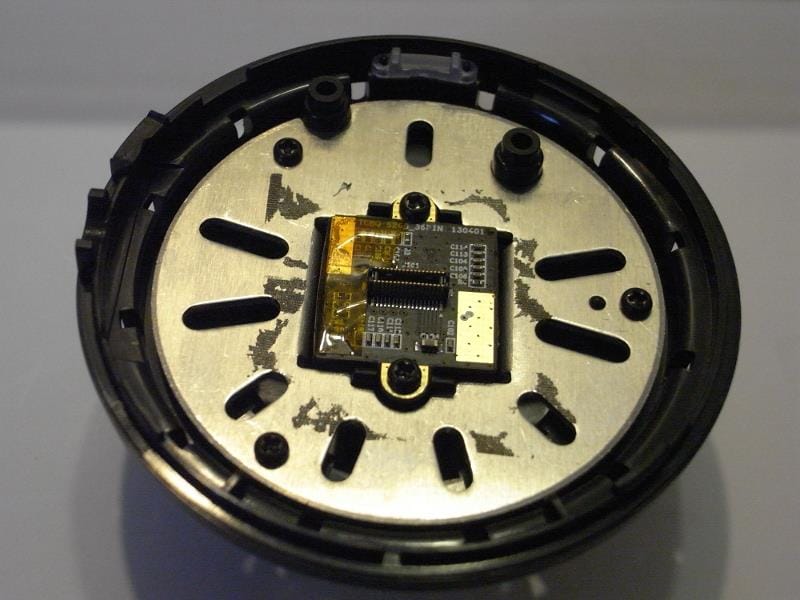
- Unscrew the two x-point screws and very carefully lift the lens holder up and away from the heat sink. There is NO need to remove the heat sink from the front housing.
- With a fine pointed needle remove the glue between the lens holder and lens holder body, and free the holder so it can screw in and out freely. Wrap the lens holder in insulation tape and use a very small pipe wrench to break the stiction of the glue. Be VERY careful!! The HD cmos sensor is inside the assembly. Do not use solvents or heat to free the thread YOU WILL DESTROY THE CMOS SENSOR IF YOU DO.
- IMPORTANT — Do not remove the lens holder completely from the housing. It is keeping the CMOS sensor from being ruined by dust and foreign matter falling onto it.
- When the lens holder is rotates freely , then reassemble enough of the camera to test it.
- Temporary reassembly: Gently press the loose circular pcb onto the fixed pcb, ( that is screwed to the rear housing), making sure the two mating halves of the inter pcb connector engage.
- Gently press the lens holder sub assembly onto the circular pcb, making sure that the pcb connector is oriented the RIGHT WAY ROUND.
- Be careful if you tilt the cam forward, the pcbs will fall off. Secure the pcbs with a strapping of insulation tape for safety.
- Connect the VGA cable and the 12v supply. Insert your sd card into the camera. Do this gently otherwise you will push the pcbs off each other.
- Now the acid test! Switch on and you should boot up and get a picture.
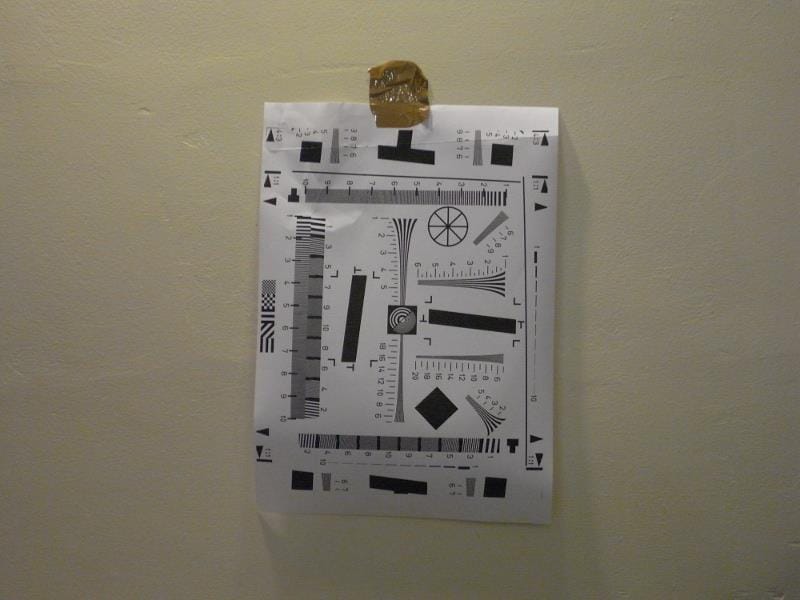
- Set the focus to your hearts desire. Just gently screw the lens in and out until you get the sharpest focus at the distance you want the sharpest focus to be at.
- Its very sensitive, about one half a turn to go from blurred to sharp to blurred again..
- You can use a camera target downloaded from the internet.
- When you have finished adjustments and tests, put a drop of glue on the lens thread and leave to dry.
- Reassemble (the reverse of above.)
- Tear down test assembly
- Put lens holder back in front housing IMPORTANT MAKE SURE IT IS THE CORRECT WAY ROUND SO THE TWO HALVES OF THE PCB CONNECTOR WILL MATE. If you marked it before disassembly it will be easier to replace correctly.
- Screw in two screws to hold it in place.
- Replace glass cloth square. MAKE SURE THAT IT DOES NOT OBSTRUCT THE PCB CONNECTOR.
- Replace the round pcb onto the fixed round pcb.
- Carefully offer the front housing to the rear housing ensuring the lens pcb connector mates correctly with the front round pcb connector.
- Replace the two screws through the holes in the front housing
- BEFORE replacing bezel on the front…… Apply power and TEST it is all connected and working correctly. ( The first time I got to here it failed because I had a strand of cloth across the ccd connector.)
- Put the circular bezel in correct position and smooth down into place.
- Finished!
Yellow Cast
One owner has indicated that the auto white balance handles fluorescent lights well, but doesn’t perform as well with incandescent bulbs. This gives the videos a yellow cast.
This was corrected via a firmware update in May 2013 (Version AC19) and is no longer an issue. Here are before and after screenshots.
Flimsy Mount
A common complaint from owners is the flimsy mount of the Lukas LK-7900. If you detach and attach your camera frequently, this mount may break.
At the end of 2013, a new mount has been provided with the camera that corrects this problem.
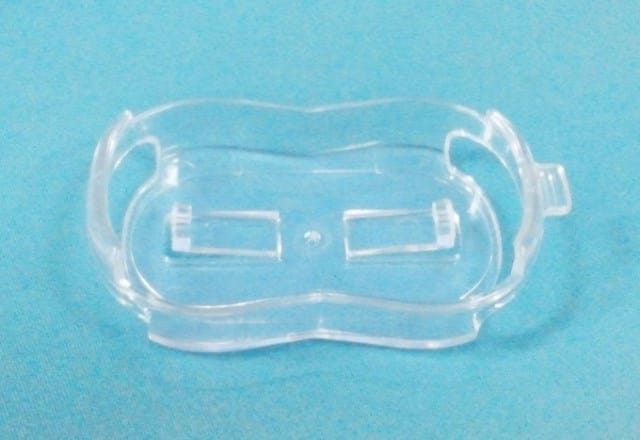
Original mount

New Mount
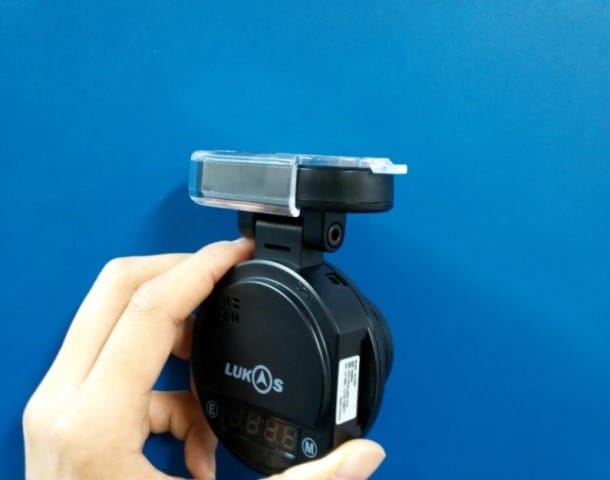
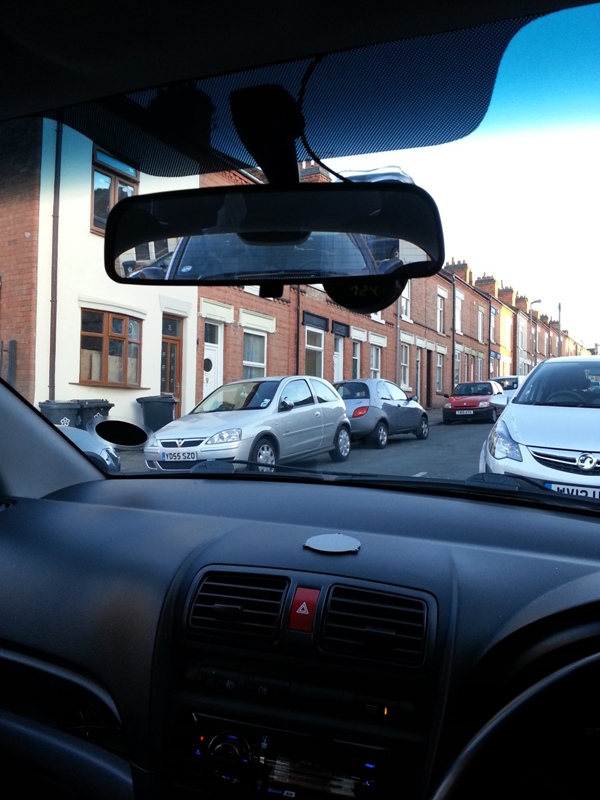
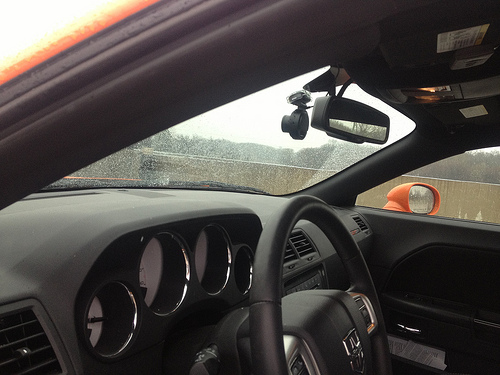
Mounting the Camera

Sample Videos
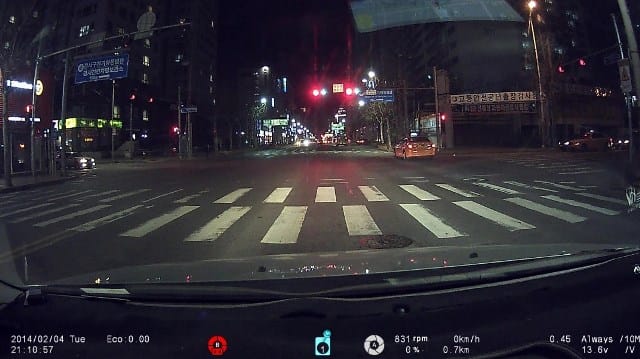
Day Video
Night Video
Comparison of LK-7900 (left) with FineVu Pro (right)
PC Viewer
The latest viewer software for the Lukas LK-7900 Ace can be found on the Lukas website and is updated frequently.
Should I Purchase?
There are many Korean cameras competing at the high end of the market. The video quality is quite good and many owners are pleased. The internal GPS, parking mode, 128GB SXDC support and wide operating temperature range are very attractive features. When mounted high on the windshield, the camera isn’t too noticeable but it also isn’t the most discreet camera.
The LK-7900 is a popular high end camera and overall one of the better cameras for the money.
Firmware
WARNING! MAKING CHANGES TO YOUR FIRMWARE ARE PERFORMED AT YOUR OWN RISK. WE ARE NOT RESPONSIBLE FOR ANY DAMAGE TO YOUR DASH CAM AS A RESULT OF THESE INSTRUCTIONS.
Firmware Update Instructions
- Download the firmware update file
- Back up important data then start formatting. (Recommended memory allocation based on Windows7 is 64KB) (Those who use 64/128GB memory card, do format through Lukas Viewer)
- Copy unziped download file into SD card
- Start the car engine. (to prevent power cut-off while updating)
- Turn on the Black box. When ‘SD_Fail’ appears on the segment window, insert SD card.
- ‘Upda’ appears on the segment window with a voice guidance.
- After the update is complete, it automatically reboots.
- The update is complete. (Black box operates after a self-format itself. (In case of ‘Memory allocation 64KB based on Windows7 excepted)
Latest Firmware
The latest firmware version can be found on the Lukas site and is updated quite frequently.
Unbricking your LK-7900
WARNING! UNBRICKING YOUR CAMERA IS PERFORMED AT YOUR OWN RISK. WE ARE NOT RESPONSIBLE FOR ANY DAMAGE TO YOUR DASH CAM AS A RESULT OF THESE INSTRUCTIONS.
Some users have unfortunately “bricked’ their LK-7900 cameras when trying to upgrade firmware. Qrontech has developed a special 4GB SD card that can unbrick these cameras. One of our members, superpat, has shared an image of this SD card. The 55MB zipped image file of this SD card can be downloaded here.
There are two visible files, dm3xx.dat and a config.bin. There may be more files on this card as there are two partitions even though you can only see one.
When you run the unbricker it installs AC23, as that was current when the card was created.
- Use the Linux dd command or use Win32 Disk Imager to write your new SD card with the provided image
- Switch the power of the black box Off
- Insert the SD unbricker card
- While pressing M button of black box, turn the power of the black box ON, Keep the M button pressed for about 10 seconds then release
- After a-couple-of-minute-long processing, black box will say to format the SD card. Ignore the message and turn the black box off.
- Try to update the unbricked AC23 to AC29 as normal.
- If it bricks goto 1
User Manual
You can download the English manual here.
Specifications
Detailed Specifications
| Read Review |
|
| Camera Type | Single Channel |
| Form Factor | Hanging - Square |
| Country | China |
| Processor | Unknown |
| CMOS Front | Sony Exmor |
| CMOS Rear | N/A |
| Channels | 1 |
| Screen | No |
| GPS | Yes |
| G-Sensor | Yes |
| Wi-Fi | No |
| Parking Mode | Buffered |
| Lock Files | Auto or Button |
| Max Resolution Front | 1920×1080p |
| Front Frames Per Second | 30 |
| Max Bitrate Front (Mbps) | 10 |
| Max Resolution Rear | N/A |
| Rear Frames Per Second | N/A |
| Max Bitrate Rear (Mbps) | N/A |
| Video Format | AVI |
| Compression | H.264 |
| Diagonal Viewing Angle Front | 135° |
| Diagonal Viewing Angle Rear | N/A |
| SD Card Type | SD |
| Max Size (Spec) | 128GB |
| Max Size (User) | 128GB |
| Size Front (mm) | 90 x 70 x 48 |
| Size Rear (mm) | N/A |
| Mount | Adhesive |
| Power Supply | 12V |
| Operating Temp | -20°C to 80°C |
| Battery | Capacitor |
| Error Notification | No |
| Apps | PC |
| Cloud Connectivity | No |
| Release Date | Feb 2013 |
| Unique Features | Buffers video in parking mode (saves 15 seconds before impact / motion detection and 15 seconds after) |
| Advantages |
Good video quality 128GB SXDC support Wide operating temperature range Buffers in parking mode |
| Disadvantages |
Some owners received out of focus cameras Could be more discreet |
| Final Word | Previously a best buy but some owners complain of blurry / out of focus image. |
Published: May 2, 2013
Last Updated: February 12, 2014
Lukas LK-7900 Ace - DashCamTalk

The Lukas LK-7900 Ace was previously a best buy but some owners complain of a blurry image.
Product SKU: Lukas LK-7900 Ace
Product Brand: Lukas
Product Currency: USD
Product Price: 235
Price Valid Until: 2023-01-01
Product In-Stock: SoldOut
5.7