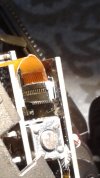
0906 disassembly

I think i fixed my right focus problem by shifting the lens socket as far left as i could, but hard to tell in low light so eager to get a drive in tomorrow.

I had a hard time getting those 2 little flex cables to play ball again, but i just kept at it and suddenly the LED's came to life when i plugged it into the mains USB PSU

I dident even have to use the 2 new flex connectors provided, so have those in spare.

Mine was not pinched, but the thin one of them looked like a pointy thing have been pressed a little into it, but they both still worked just fine.
 
I checked the cable . Maybe one of the lock is lose (not broken). I guess it not build to be taken apart and installed again. I tried to be very careful with all process.
The power from GPS is not working either. I don't see any broken cable either. :(
So I guess I'm finish as test person unless @Rayman.Chan would be so kind to send another one to me.
Really sounds like a flexcable issue. If the lock is loose its not connected properly. Im not sure if the flexcables can be swapped, did you keep them inserted in one of the pcbs during disassembly?
 
Really sounds like a flexcable issue. If the lock is loose its not connected properly. Im not sure if the flexcables can be swapped, did you keep them inserted in one of the pcbs during disassembly?
They are 1 sided, I replaced one of mine because the original had been trapped between case and PCB, and I had to get it the correct way up, but I chose it at random and it worked so I'm 50% sure that they are identical.

It's not easy to get it in the correct place before closing the lock, it is probably just out of place, it does need to be slid into the contacts before closing the latch.
 
Mine is now a little out of focus on the left, watching back at the focussing video, it came into focus on the left first, then went out of focus by the time the centre and right where in focus, so it seems the mount isn't sitting flat. The original mount appears to have been sanded flat on the bottom, the 2nd replacement hasn't been. I'll have to take it apart again and investigate, maybe give the mount a sanding on the bottom, or maybe just rotating 180 will work, although I guess it will then be like yours and out of focus on the right!

@Nigel , there was an issue with the early "C" lens modules on the Mobius camera due to a warped sensor backing plate that required similar alignment adjustments. Rather than sanding, I would recommend what I and others did with the Mobius module which was to use a small strip of paper or plastic of the appropriate thickness as a shim in the right spot until you get it corrected. With sanding if you remove too much material or sand the wrong spot there is no going back but with shims you can make adjustments or even start all over again.
 
@Nigel , there was an issue with the early "C" lens modules on the Mobius camera due to a warped sensor backing plate that required similar alignment adjustments. Rather than sanding, I would recommend what I and others did with the Mobius module which was to use a small strip of paper or plastic of the appropriate thickness as a shim in the right spot until you get it corrected. With sanding if you remove too much material or sand the wrong spot there is no going back but with shims you can make adjustments or even start all over again.
It may just have a lump on it since this one seems worse than the original, so I will sand it a little first to ensure it is flat, as the original appears to have been. If that doesn't work then a shim sounds a good idea, although I've no idea what thickness is needed?
 
did you keep them inserted in one of the pcbs during disassembly?
Yes I open one the lock on side, slide the cable out like 1mm, so the cable was free, before I separated the 2 pcb . When I tried to lock the cable in, the lock have a hard time to stay put.
On the side there is these 2 metal hook, I have tried to push just like a 1/10mm to stay put. I have use a magnifier glass 30X and I don't see any broken parts or part there look like it has been abuse.
The lock is just lose.
 
It may just have a lump on it since this one seems worse than the original, so I will sand it a little first to ensure it is flat, as the original appears to have been. If that doesn't work then a shim sounds a good idea, although I've no idea what thickness is needed?

Thickness requires some trial and error and a hunt around your house or workbench for the right material. :)
 
Yes I open one the lock on side, slide the cable out like 1mm, so the cable was free, before I separated the 2 pcb . When I tried to lock the cable in, the lock have a hard time to stay put.
On the side there is these 2 metal hook, I have tried to push just like a 1/10mm to stay put. I have use a magnifier glass 30X and I don't see any broken parts or part there look like it has been abuse.
The lock is just lose.
You probably don't have the cable in the correct place then, I think it fits into a groove if it is in the right place and that allows the latch to close.
 
I've hassled with seating these little ribbon cables before and found that using a flat tipped plastic tweezers or a "safe" metal one to position and insert the cable can make the whole process easier and improve chances of getting it right the first time.
 
You probably don't have the cable in the correct place then, I think it fits into a groove if it is in the right place and that allows the latch to close.

I have use a magnifier glass 30x to check the cable come in strait. It has been pushed the same length in as the other cable, there is locked.

20 years ago I repaired Compaq laptop, so its not like I never have touch some of these cable before. Maybe not so small.
 
mine also appeared to be seated well every time ( 10 - 20 tries ) but i guess it just wasent after all, but it sure looked and felt that way when i looked at them or pulled a little in them.

Even took them both off fully to make sure i had not flipped one of them so the contact surface was on the wrong side.

At one time i was pretty desperate and also posting in here.
 
If I touch this cable just a little, the lock will spring up. very light touch.
20170517_183546.jpg
 
If I touch this cable just a little, the lock will spring up. very light touch.
Mine is back together so I can't easily compare the cable position.

I put the cables back in using my fingers not tweezers. To get it in the right place I had to slide it in to the contacts a little higher up than expected - it doesn't slide across the base but goes in 1 or 2mm off the base into the metal contacts, then close the latch. The latch is very easy to close if the cable is in the correct place, using a flat bladed screwdriver.

(Not sure if you are doing it wrong or not, just trying to help, mine did work again first attempt.)
 
That don't look seated to me ? i think i only saw 1/2 of that darker orange part than what i see in this pic.

Flexconnect.jpg


Looks like half the connectors are not inside the socket ?
 
But in the interest of the common good i will take my camera a little apart so i can take a picture of one of my flexi connectors seated and working.
 
I welcome all the help I can get. Everything to gain, nothing to lose.
 
This should be the same flexi cable, and sort of same camera angle too.

flexseat1.jpg

flexseat2.jpg


When you snap shut the locking "lever" then it should be a little tight when the damn thing are properly seated, then again i also thought it was that when i struggled with it.
 
Note that in Kamkar's photo you can see the cable under the pins beyond the clamp
 
Back
Top